From Github Desktop To CLI
Everything that you're going to be doing using Git CLI you can also do using Github Desktop.
In this page, you'll comparisons of how to complete command tasks on both Github Desktop and Git CLI.
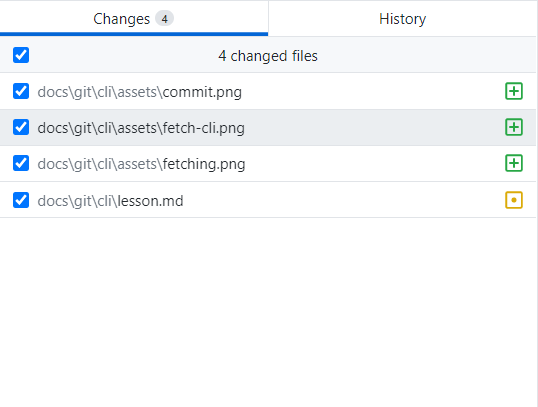
Viewing Changed Files
To view the files that you have changed you can use
git status
This will show a list of files that have changed since the last time that you committed.
| Github Desktop | Git CLI |
|---|---|
 |  |
Including Files to Commit
One key difference between Github Desktop and Git CLI is that you need to set which files will be committed to your repository. You can add files to be committed by using
git add .
This command will add every file you have changed to be ready to commit
| Github Desktop | Git CLI |
|---|---|
 |  |
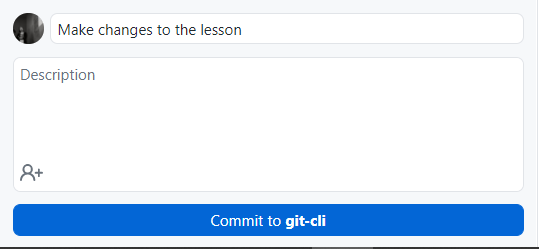
Committing Changes
Committing changes to your repository can be done by using this command
git commit -m "YOUR MESSAGE HERE"
The -m means that after you are going to write your commit message. Make sure to put your commit message in quotes! You can press enter to add new lines in your message, too.
Some characters are treated specially in the terminal, and we can tell the terminal not to treat them specially by escaping them with a backslash. For example, if you want to use a quote character inside your message, you need to escape it, otherwise the terminal will think your quote is the end of the message:
git commit -m "Use \"s instead of 's"
Here's how committing on Github Desktop and Git CLI is different
| Github Desktop | Git CLI |
|---|---|
 |  |
Pushing Changes to Github
Finally, pushing your changes to Github can be completed by using
git push
| Github Desktop | Git CLI |
|---|---|
 |  |
Fetching from Github
To check if there have been any changes on Github you can use
git fetch
| Github Desktop | Git CLI |
|---|---|
 |
Pulling from Github
To pull any changes from Github you can use
git pull
| Github Desktop | Git CLI |
|---|---|
 |  |