React - Week 2
Click here to see the Learning Objectives for this lesson.
Recap
Last week we looked at how to write a HelloMentor React component (interactive example):
function Greeting() {
  return <span>Hello</span>;
}
function Mentor(props) {
  return <span>{props.name}</span>;
}
import Greeting from "./Greeting";
import Mentor from "./Mentor";

function HelloMentor() {
  return (
    <div>
      <Greeting />
      <Mentor name="Ali" />
    </div>
  );
}
Handling events
So far we have only looked at React apps that are "static": they don't respond to user input. This week we will look at making our apps dynamic.
Recap: First-class functions in JavaScript
Before we look more at React we need to recap a concept in JavaScript. You may remember that functions in JavaScript are "first class" - that means we can pass a reference to a function (as a variable) and then call it elsewhere. Let's look at an example (interactive example):
function hello() {
  return "Hello!";
}

console.log(hello); // Logs: "ƒ hello() {}"
console.log(hello()); // Logs: "Hello!"
In the example above hello is a reference to a function. In the first console.log we log out the whole function. The function is not called until we use parentheses (), so we only log the string "Hello!" in the second console.log.
This is a really important and useful in React, as we can make a function and pass it to React so that it can call it when a user interacts with our app.
Event handlers in components
In previous lessons we learned how to attach event listeners with addEventListener:
// Create an event handler
function logWhenClicked() {
  console.log("buttonElement was clicked!");
}

// Listen for events and call the event handler when triggered
buttonElement.addEventListener("click", logWhenClicked);
We still need to listen to events in React, but event handlers are set up in a slightly different way (interactive example):
function ClickLogger() {
  function logWhenClicked() {
    console.log("Button was clicked!");
  }

  return <button onClick={logWhenClicked}>Click me!</button>;
}
Every element in React has some special props that start with on that can be assigned to a function which will be called when the event is triggered.
Here's a few examples (a full list is available here):
onClick- the element was clickedonCopy- the clipboard is used to copy some textonKeyDown- a key is pressed downonBlur- the element loses "focus"onChange- only available for<input>&<select>(and a few others), triggered when changedonDoubleClick- the element was double-clicked!onPlay- a video starts playingonSubmit- a form element is submitted
Notice that just like with addEventListener above, we pass the function reference to onClick instead of calling the function. If we call the function, it will run the function when we render, not when the user clicks on the button. (Remember that rendering is the term in React for inserting into the DOM).
Think of it like this: we give the event handler to React, so that React can call our function when the element is clicked.
Exercise A (estimate: 15 min)
In this exercise we will extend our Logo component to log to the console when clicking on the image.
Welcome to the Pokedex

You should then complete the following steps:
- Open the
pokedexReact application from last week and open theLogo.jsfile. - Add a function named
logWhenClickedwithin theLogocomponent. (Hint: look at the example above). - In the
logWhenClickedfunction,console.loga message (it doesn't matter what the message is). - Add an
onClickhandler to the<img>that will calllogWhenClicked. (Hint: look at theClickLoggercomponent above). - In your web browser, try clicking on the logo image. What do you see in the JavaScript console?
- In a group of 2 - 3 trainees, discuss what would happen if you changed your code to
onClick={logWhenClicked()}. Can you explain why? - Report your discussion back to the rest of the class.
Passing Functions as Props
Sometimes we need to pass a function to another component as a prop, so that it can handle the event.
A common example for this is a Button component. This component adds some styling to a normal <button>, but still needs to be able to pass an event handler function to onClick. Let's look at an example (interactive example):
function ClickLoggerApp() {
  function logWhenClicked() {
    console.log("Button was clicked");
  }

  return (
    <div>
      <FancyButton handleClick={logWhenClicked} />
      <p>Then look in the console.</p>
    </div>
  );
}

function FancyButton(props) {
  return (
    <button className="my-fancy-classname" onClick={props.handleClick}>
      Click Me!
    </button>
  );
}
Notice how this is very similar to the example above where we created the handler and used it in the same component? The only difference here is that we are passing the function reference through a prop. We could even pass it through multiple components as props.
Exercise B (estimate: 15 min)
In this exercise, we'll move the logWhenClicked function in the Logo component to the App component. Then we'll make App pass those variables as props to the sub-components. Your app should still look the same in your browser as Exercise A.
- Open the
pokedexReact application and open theLogo.jsfile. - Copy and paste the
logWhenClickedfunction from theLogocomponent to theAppcomponent. - Pass the
logWhenClickedfunction reference as a prop to theLogocomponent. (Hint: look at theClickLoggerAppcomponent above for an example). - In the
Logocomponent change theonClickprop so that it passesprops.handleClick. (Hint: look at theFancyButtoncomponent above for an example). | - In a group of 2 - 3 trainees, discuss what you think will happen when you click the logo image now. Can you explain why?
- Report back to the rest of the class what you thought was going to happen and why.
Re-rendering components
So far we've seen that when the page loads, React calls our function components. The JSX elements that are returned from the component functions are turned into the DOM for you by React.
To be able to react to changes, we need to re-render our function components to get different JSX elements. React can then update the DOM based on the new JSX elements.
Let's look at how a component is re-rendered (interactive version):
function Counter(props) {
  console.log(`Rendering. props.likeCount is ${props.likeCount}`);

  return <button id="like-button">Likes: {props.likeCount}</button>;
}
If you look in the console, you'll see that the component is rendered once when the page loads. props.likeCount starts at 0, so React inserts "Count: 0" into the DOM.
We won't look at how this works at the moment, but behind the scenes there is some code that will listen for clicks on the button and force React to update. That means when you click the button, the function component is called again (or re-rendered).
Now props.likeCount is 1. React now updates the DOM to make sure it shows the correct number. Every time we click the button, the function component is called and React updates the DOM for us.
We don't need to worry about changing the DOM ourselves! This is what makes React so powerful. Even better, React will figure out exactly the right bits of the DOM that need to be changed, a concept called the "virtual DOM". This makes it extremely efficient and fast.
State
State is a general concept in software engineering. It is used when a part of your app needs to "remember" something that changes when people interact with it.
This is a simple example, but if we had lots of bits of state, then we can make very complex apps.
React Hooks
React has built-in functionality for initialising and updating state in our components. We will access state via a React Hook called useState.
Hooks are a new-ish feature in React. You may find older tutorials that don't use Hooks, but don't panic. The concepts we learn here are the same whether or not you use Hooks. We are looking at Hooks first because they are simpler to learn for beginners.
Importing useState
To be able to access the useState Hook, we first need to import it from the React package. Let's look at an example (interactive example):
import React, { useState } from "react";

console.log(useState);
If we look at the console, useState is just a function. It lives inside the React code that you installed when you created the app.
To reference the useState function in our component, we need to import it from the React code. The curly braces around useState are a bit like writing:
import React from "react";
let useState = React.useState;
In fact we can just write React.useState in our component if we want! But to type a bit less code, we import it (using the curly braces) once and then can just use useState.
Using useState
Now let's look at how we can use the useState Hook (interactive example):
function Counter() {
  const [count, setCount] = useState(0);

  return <p>You clicked {count} times</p>;
}
Let's break this down into small pieces. First, let's look at calling the useState function:
useState(0);
This initialises the state variable to 0. Any parameter passed to useState will be used as the initial value.
Next, let's look at how we render the state variable in our component:
return <p>You clicked {count} times</p>;
count is just a variable, so to insert it into our JSX we treat it like any other variable: we use curly braces.
Finally, let's look at how we get hold of the count variable:
const [count, setCount] = useState(0);
If you remember back to JS Core 3 Week 3, we covered destructuring. As a reminder, you can assign variables to parts of an array with destructuring:
let [firstWord, secondWord, thirdWord, fourthWord] = [
  "Hello",
  "Code",
  "Your",
  "Future",
];
console.log(firstWord); // Prints "Hello"
console.log(secondWord); // Prints "Code"
console.log(thirdWord); // Prints "Your"
console.log(fourthWord); // Prints "Future"
In React, useState will always return an array with two items. The first item in the array is the current value of the count state. In our example it will be 0 on the first render. The second item in the array is a function that we will use to update our state.
Follow the useState naming convention.
When we destructure an array, we can name the variables whatever we want, but there is a naming convention when destructuring the useState array. The first variable should be named whatever your state is called, and the second variable should be the same name but prefixed with set. Let's look at some examples:
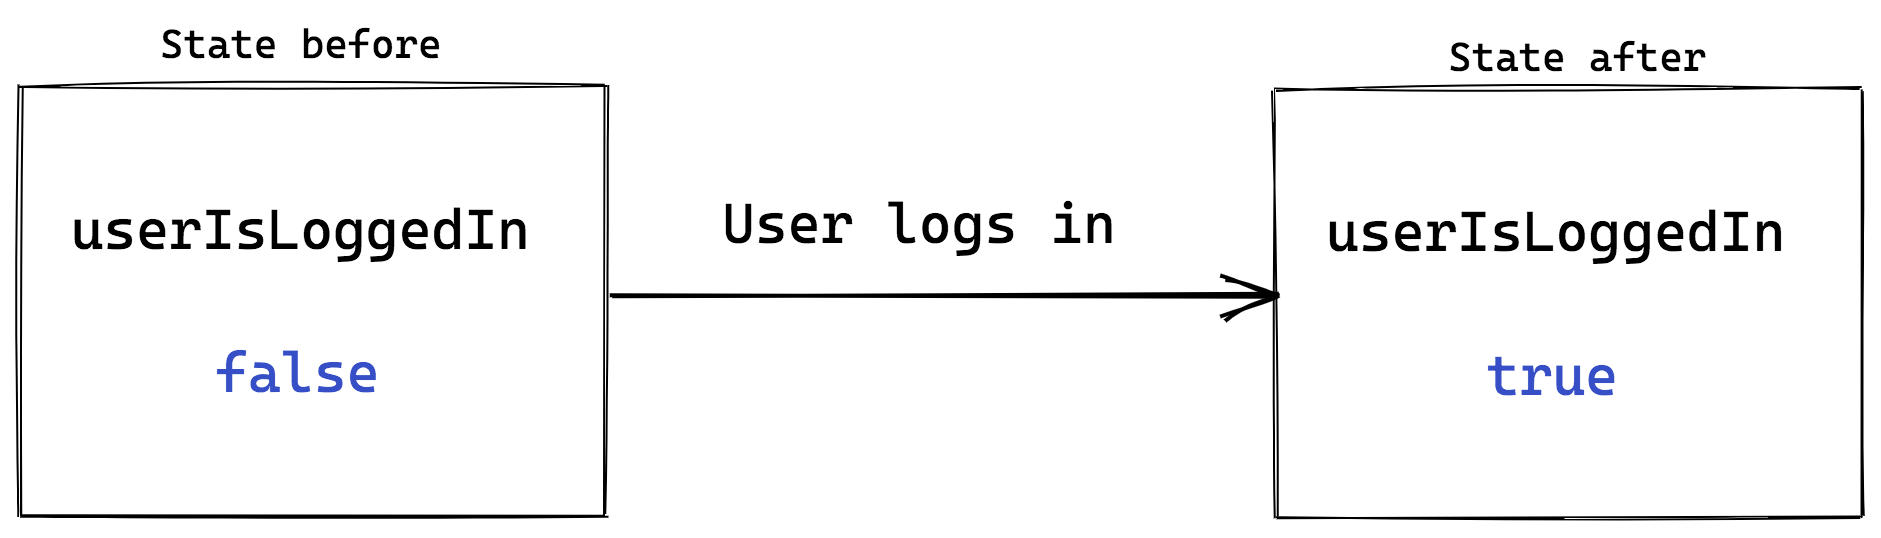
const [userIsLoggedIn, setUserIsLoggedIn] = useState(false);

const [username, setUsername] = useState("chris");

const [unreadMessages, setUnreadMessages] = useState(5);
Exercise C (estimate: 10 min)
- Open this CodeSandbox.
- Take a few minutes to read the code. Why do you think the app is broken?
- Initialise a new state variable with
useStatethat will fix the app. Think carefully about how you should name the variables. - Discuss with another trainee how you would create another state variable that represents the weather conditions (e.g. sunny, rain).
Updating State
Our Counter isn't very useful right now! Let's make it more useful by getting count to actually count up (interactive example):
function Counter() {
  const [count, setCount] = useState(0);

  function incrementCount() {
    setCount(1);
  }

  return (
    <div>
      <button onClick={incrementCount}>Click me</button>
      <p>You clicked {count} times</p>
    </div>
  );
}
Our component now has a <button>, which will call the incrementCount function when clicked:
<button onClick={incrementCount}>Click me</button>
The incrementCount function calls setCount to set the new state to be 1:
function incrementCount() {
  setCount(1);
}
setCount does two things. First, it updates the state that our component is "remembering". Whatever you pass as the argument to setCount will be remembered as the new state.
It also tells React that the old state that is still shown in the DOM is outdated and so the DOM needs to change. Because of this, React will re-render all of our components to figure out what to change in the DOM.
When re-rendering, React will call our Counter component again, but this time when we call useState it will give us the updated state of 1, instead of the initial state of 0:
function Counter() {
  const [count, setCount] = useState(0);

  ...
}
On the second render, count is now set to 1. If we wanted to set the state to a different value, then we pass a different value to setCount.
Setting state based on previous state
You might have noticed that our Counter app isn't very useful... It can only count to 1! You might think that we could do something like this (interactive example):
This code has a bug!
function incrementCount() {
  setCount(count + 1);
}
However, this code has a bug. Let's see what happens if we put 2 setCount calls within incrementCount (interactive example):
function incrementCount() {
  setCount(count + 1);
  setCount(count + 1);
}
If you click the button, then the counter will only count up to 1. This is because the count variable does not actually update until the component re-renders and useState gives a new value of count. We can see this if we put a console.log(count) in-between the setCount calls.
As you can see, count remains at 0, even after we try to update it to 1. This means that in the second setCount call we are actually still trying to update the state to 1!
To fix this problem, there is another way we can call setCount if we always need to get the latest version of state when setting it (interactive example):
function incrementCount() {
  setCount((c1) => {
    return c1 + 1;
  });
  setCount((c2) => {
    return c2 + 1;
  });
}
When we pass a callback function to setCount, React will pass us the latest version of the count state. In this example, the variables are named c1 and c2 to make it clear that they are different from the count variable. Now if we add console.log(c1) and console.log(c2) then we can see that they get the correct values.
Reminder: c1 and c2 are just arbitrary names we pick to be the name of the parameter to the function we're passing - we could have called them both c, and everything would still work - they're not related to each other, as they are defined in different scopes.
If you need to calculate the new state based on the old state, then use the callback function to make sure the variable is up-to-date.
Exercise D (estimate: 20 min)
In this exercise, we'll add a button to the CaughtPokemon component which adds one to the number of Pokemon you have caught:
Caught 0 Pokemon on 7/14/2024
You should complete the following steps
- Open the
pokedexReact application and open theCaughtPokemon.jsfile. - Create a new state variable with
useState. It should be namedcaughtand be initialised to0 - Within the JSX, there should be a "hard-coded" number 0. Replace it with your new
caughtstate. - Add a button to the component with an
onClickhandler that calls a function calledcatchPokemon. - Create the
catchPokemonfunction and have it update thecaughtstate so that it is increased by 1 on each click.Click here if you are stuck.
You will need to call the set state function (the 2nd item in theuseStatearray) withcaught + 1. - Write down the things that will happen when you click the button. Compare your list with another trainee and discuss.
Click here for a hint.
The state will be updated to be the current state + 1. React is notified that our state has changed, so it re-renders. When rendering, the current state will be different and so React updates the DOM.
Don't mutate State
As we just learned, setCount updates the state for us, but it also notifies React of changes. If you try to just change the count variable without using setState, nothing will happen, because React wouldn't be notified of the change. You can only modify (or mutate) state using the setter function (interactive example):
function Counter() {
  let [count, setCount] = useState(0);

  function handleClick() {
    count = count + 1;
  }

  return (
    <div>
      Count: {count}
      <button onClick={handleClick}>Click</button>
    </div>
  );
}
Where does State live?
We have talked about how a component "remembers" state. In fact, each component instance remembers separate state from other components. This means we can have multiple different Counters, each with a different state (interactive example):
function App() {
  return (
    <div>
      <Counter />
      <Counter />
      <Counter />
    </div>
  );
}
More complex states
The examples we've looked at so far have used numbers, strings and booleans. You can also use arrays and objects in state too. Let's take a look at an example (interactive example).
function ShoppingList() {
  const [list, setList] = useState([]);

  function addToList() {
    setList(list.concat("Bread"));
  }

  return (
    <p>
      <button onClick={addToList}>Add item to list</button>
      {list.map((item, index) => {
        return <li key={index}>{item}</li>;
      })}
    </p>
  );
}
In this shopping list example, we're initialising the list state to be an empty array. To display our list we loop through the array (like we learned last week) and render an <li> for each item in the list.
When we want to add something to the list, we can use the list.concat method to make a new array with the new item. This new array is then set as the new state. Right now, our example is not very useful as it can only add Bread to the list! Next week, we'll look at how we can allow users to write their own items to the list.
Don't use the array push method with state. Instead use the array concat method.
The list.push method won't work here, as this method mutates the existing array. React requires a completely new array to be set as the new state, otherwise it doesn't realise that the value has changed. The concat method works because it copies the whole existing array to a brand new array before it adds the new item.
Exercise E (estimate: 15 min)
In this exercise, we'll change the CaughtPokemon component to show a list of Pokemon that we have caught instead of a number:
Caught 0 Pokemon on 7/14/2024
- Open the
pokedexReact application and open theCaughtPokemon.jsfile. - Change the
useStateto be initialised to an empty array ([]) - There will now be a bug in your app! We don't see how many Pokemon we have caught. Discuss with another trainee what you think the problem is.
- Change the JSX to instead render
caught.length. Does this fix the bug? - Let's now show the names of the Pokemon we have caught. Render a
<ul>element within the component. Then use themapmethod to loop through each item in thecaughtarray and render it in an<li>element. - Change the
catchPokemonfunction to add a new Pokemon (it doesn't matter which one) onto thecaughtarray. (Hint: use theconcatmethod.) - (STRETCH GOAL) Generate a random Pokemon each time you click the button
Click here if you're stuck.
This StackOverflow post may be helpful.
Setting multiple States
So far we've only seen an example with one state variable. But you can create multiple state variables if you want! Let's see an example (interactive example):
function Weather() {
  const [temperature, setTemperature] = useState(15);
  const [conditions, setConditions] = useState("sunny");

  function makeItHotter() {
    setTemperature(temperature + 1);
  }
  function makeItColder() {
    setTemperature(temperature - 1);
  }

  function makeItSunny() {
    setConditions("sunny");
  }
  function makeItRainy() {
    setConditions("rainy");
  }

  return (
    <div>
      <h1>Today's Weather</h1>
      <ul>
        <li>Temperature will be {temperature}°C</li>
        <li>The conditions will be {conditions}</li>
      </ul>

      <hr />
      <button onClick={makeItHotter}>+</button>
      <button onClick={makeItColder}>-</button>
      <button onClick={makeItSunny}>Make it sunny</button>
      <button onClick={makeItRainy}>Make it rainy</button>
    </div>
  );
}
When do you use Props or State?
We've looked at the 2 main ways of managing data in our React components. But when should we use props and when should we use state?
Remember that props are like "arguments" to a component. It's good practice to make sure that you don't modify arguments after you receive them. Just like state, React prevents you from mutating them. Let's have a look at an example (interactive example):
function Greeting(props) {
  function handleThing() {
    props.name = "Mozart";
  }

  return (
    <div>
      <p>Hello {props.name}</p>
      <button onClick={handleThing}>Click me</button>
    </div>
  );
}
When you click the button, you might expect the name prop to change to "Mozart". But it doesn't! React has made props read-only, which is a reminder that we shouldn't change props.
If we were allowed to change props, React doesn't have a way of telling that we've changed the data. Our UI is now stale - not up-to-date with the latest data - and has no way of knowing that it has to re-render.
From this we can get a clue about when to use state. If data changes over time, then we need to use state. My rule of thumb is that I always use props until I know that it needs to change over time, then I convert it to state.
Exercise F (estimate: 10 min)
- Open this CodeSandbox.
- Take a few minutes to read the code. Discuss with another trainee what you think will happen when you click on the highlighted word. |
- Now click on the highlighted word. Can you explain why this happened?
- Fix the app so that clicking on the highlighted word will change the highlight color to purple.
Further Reading
What happens if you forget to pass a prop to a component? Or if you pass the wrong type of data to a component? Sometimes React will just render an empty element but sometimes it could throw an error! This is why propTypes are useful. This page on the React documentation describes how to use propTypes in more detail.
Exercise G (OPTIONAL)
Complete the FreeCodeCamp exercise on propTypes: Use PropTypes to Define the Props You Expect.
PD (Futurespective)
Session objective: This session aims to explore how to use the futurespective technique.
Adapted from How Futurespectives Help Teams to Reach Their Goals
Many agile teams conduct retrospectives to reflect on their ways of working and to find things that can be improved. But what if teams are just starting up and trying to figure out how to do their work? A futurespective exercise helps agile teams to find ways to reach their goals, agree upon their ways of working and define a “definition of done”. In a futurespective, teams place themselves in the future by imagining that the goal they set in the past has been reached.
::: note Exercise 1 (30 minutes)
Exercise objective: To identify the goals of the team and the benefits earned achieving them.
Work in small groups. Imagine that this is your CYF final project. You have been tasked with developing an app that will collect feedback from CYF trainees on their experience of the PD sessions to help improve the course for future trainees. Start by discussing your team’s goals. As a team, you should build a common understanding of your goals, and write them down so that they are visible to everybody in the team.
When this list of your goals is ready, imagine that today is the day after the final projects. You achieved all your goals! Make a list of all the benefits you earn from reaching your goals as a team.
:::
Exercise objective: To identify good practices that helped achieve the goals.
It’s time for a retrospective. Continue working as a group and discuss your imaginary past and explore how you achieved your goals. You can use the following questions to help with your discussion:
- What are the things that have helped you to get here?
- Which things made it hard for you to reach your goal?
- What did you learn as a team along the way towards reaching your goal?
Coursework
Click here to view the coursework for this lesson.
Feedback
Please spend two minutes reviewing this lesson to help us improve it for the future. This feedback will be shared with volunteers.