AWS & DynamoDB Workshop
What we will learn today?
- Databases overview
- MongoDB
- Mongo Shell
- Mongo with Node
Before we start
Download and install MongoDb from https://www.mongodb.com/download-center#community. Follow the instructions for your platform (Windows, Linux or OS X).
Also download and install RoboMongo from https://robomongo.org/download.
Open two instances of terminal.
Run mongod—this will start MongoDB then run mongo on the other window.
In the mongo shell (terminal), run the command version() and you should get
the version of Mongo printed on the terminal
Databases overview
Discussion:
- What is a database role?
- Why do we need a database? Why not just use the file system?
- What would make a good database?
Why a database
- Databases can store very large numbers of records efficiently (they take up little space).
- You can have strucutre on your data
- You can query for data in a database, you can sort data, add/edit/delete data
- You can optimise a database to make searches (queries) quicker
- You can relate pieces of data to each other to avoid duplication which makes your information more reliable and less prone to errors
- ACID
In computer science, ACID (Atomicity, Consistency, Isolation, Durability) is a set of properties of database transactions intended to guarantee validity even in the event of errors, power failures, etc.
- Databases can handle very large data sets.
- Databases are concurrent; multiple users can use them at the same time without corrupting the data.
- Databases scale well
Relational and non-relational databases
There are mainly two flavours of databases used commercially these days. Relational (SQL) and non-relational (NoSQL) databases.
Relational databases include MySQL, Postgres, Microsoft SQL Server, Oracle Database and many others. They've been around for a long time and they're used for all kind of applications.
Non-relational databases are relatively new and they include the likes of MongoDB, Casandra, Neo4j etc...
Mongo
MongoDB is a free and open-source cross-platform document-oriented database program. Classified as a NoSQL database program, MongoDB uses JSON-like documents.
BSON (JSON-like document)
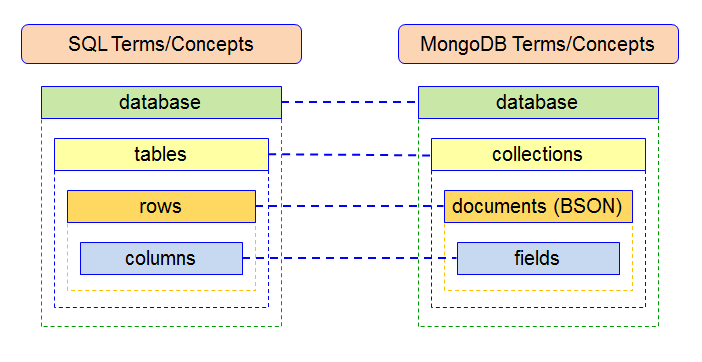
In a Relational database, information is organised in rows in tables with predefined columns.
In a non-relational database, information is organised in documents. MongoDB stores data records in a format similar to JSON called BSON. BSON is a binary representation of JSON documents, though it contains more data types than JSON.

Let's look at this database table Students containing information about
students participating in a course 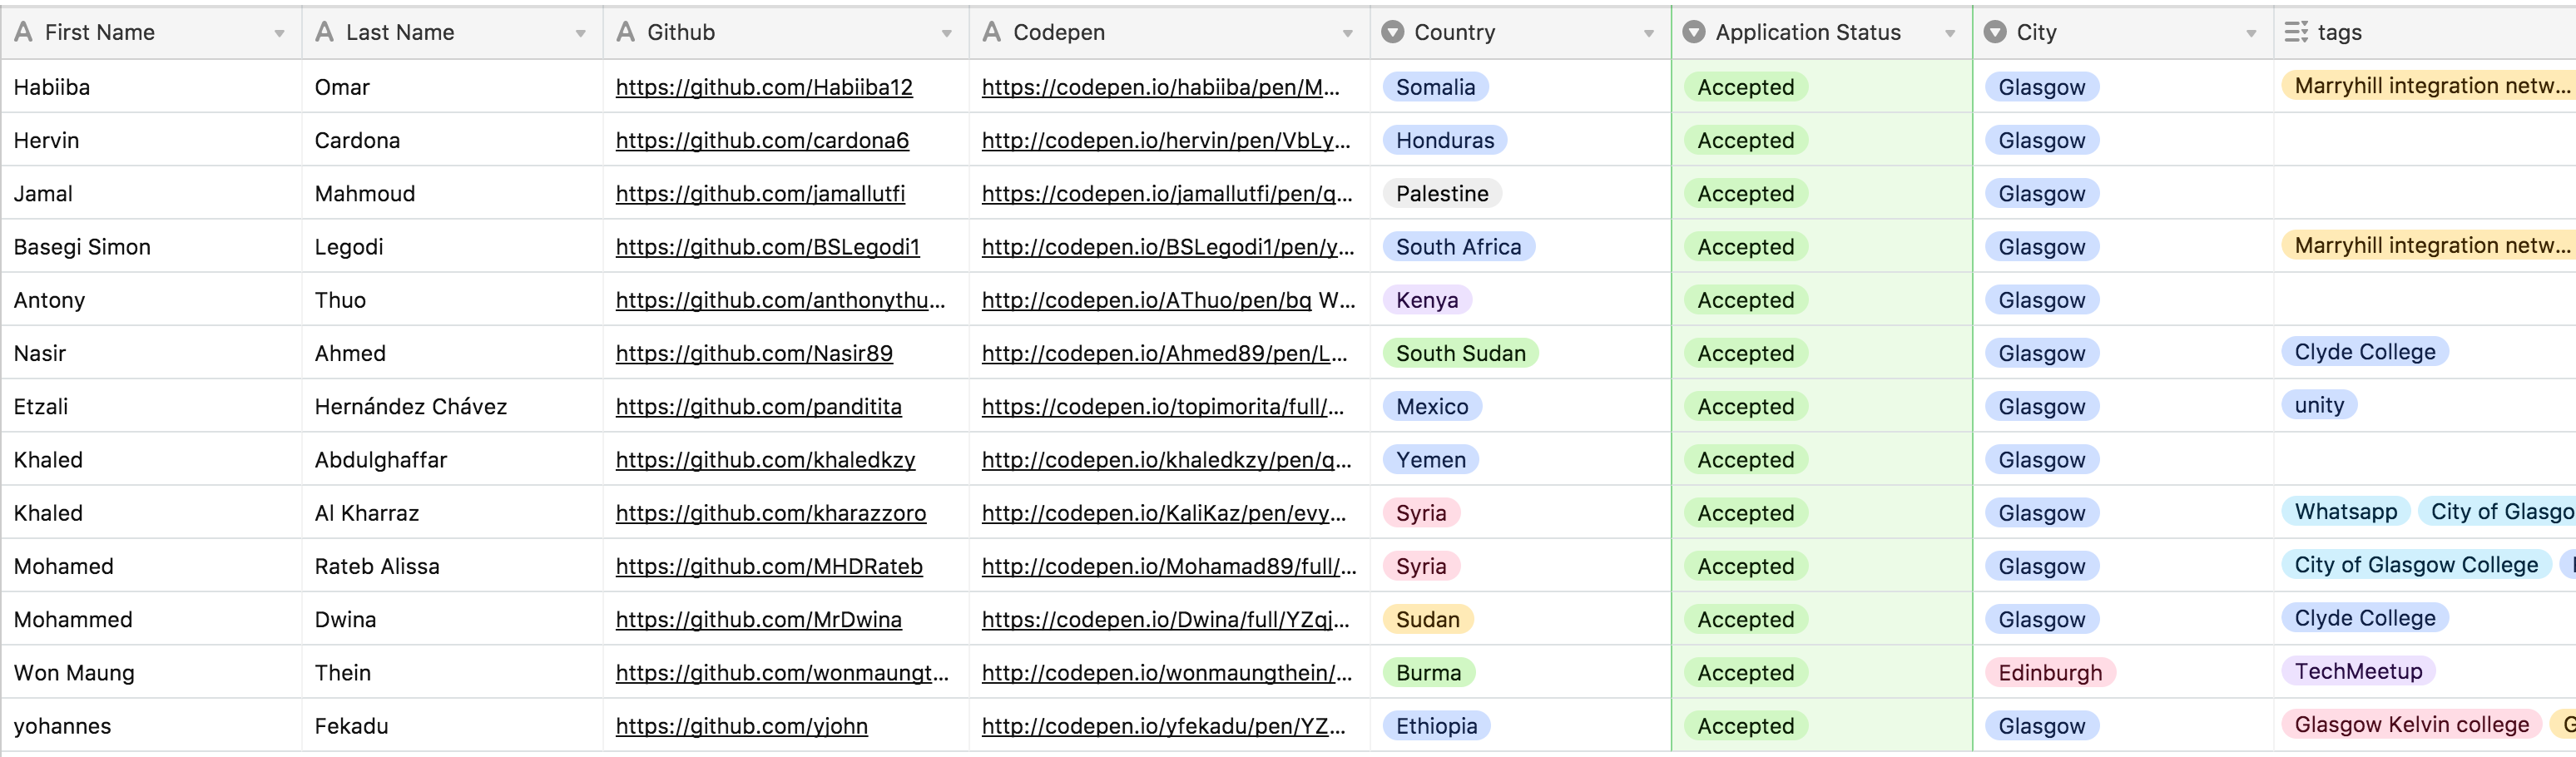
Exercise: What are the columns, rows and tables?
Exercise: Open https://jsonlint.com/ and write a JSON representation of two rows in the Students table example. Click Validate JSON and make sure the document is valid.
- Are there any alternative representations you can think of?
BSON is very similar to JSON. It contains more data types than JSON, it also allows the field names to not be quoted. Read more information about the format: https://docs.mongodb.com/manual/core/document/.
Mongo Shell
Let's go to mongo shell and start interacting with our database system.
1. Create a database
On the shell, type the command use profile The shell should respond with
switched to db profile. At this stage, the database does not necessarily
exist once we start adding information (collections) then the database will be
created and the collection added to them.
To check the current database, run db.
2. Create a collection
Now let's create our first collection. Make sure you're using the profile
database. Run db and it should print profile on the terminal.
We will insert a simple document representing a student.
db.students.insertOne({ name: 'Habiiba', country: 'Somalia', assignedMentors: ['Ashleigh'] })
You should get a confirmation with the number of records inserted.
You can also insert more than one document at a time. Run this command
db.students.insertMany([{ name: 'Khalid', country: 'Yemen' }, { name: 'Yohannes', country: 'Ethiopia', assignedMentors: ['Michael'] }])
run the command db.students.count() and you should get that you have 3
documents.
3. Querying data
Querying is one of the most important reasons that we use databases. SQL is the
language used for querying relational databases, In MongoDB, we can use the
method db.collection.find, passing a query in the form of a JSON object as a
first parameter.
Let's try few queries:
Get all the students from Ethiopia.
db.students.find({country: 'Ethiopia'})
We can also provide an extra parameter projection to define what fields we
want back from the query.
For example, if we're only interested in the name
db.students.find({ country: "Ethiopia" }, { name: 1 });
// you can also use { name: true }
Let's add another two students to the collection
db.students.insertOne({ name: 'Mohamed', country: 'Sudan', assignedMentors: ['Michael'] })
and
db.students.insertOne({ name: 'Mohamed', country: 'Syria', assignedMentors: ['Michael', 'Ashleigh'] })
Now let's query for all the students that have Michael as mentor.
db.students.find({ assignedMentors: ["Michael"] });
What if we want to find any student whose name is "Mohamed" AND whose country is "Sudan". You can then use the logical query operator \$and.
db.students.find({
  $and: [{ name: "Mohamed" }, { country: "Sudan" }],
});
Notice that name and country are case-sensitive.
Exercise
- Find all students for whom Ashleigh is an assigned mentor.
- Find all students that have Michael as their only mentor
- Find students whose name is Mohamed OR Michael is their only mentor
- Read about the \$in operator and use it to find students whose country is either Sudan or Ethiopia.
- Look at the other Comparison Query Operators and the Logical Query Operators and use few of them.
Key Concepts so far
In Mongo, a database contains collections that contain BSON documents. We can use the mongo shell to interact with our Mongo databases. The query documents are used to specify a selection filter using query operators to search for documents in the collections.
Checkpoint: Do you understand all the words highlighed in the last paragraph?
Node with Mongo
So far we've been connecting to Mongo using the Mongo shell. Mongo has drivers for most major programming languages but it's especially popular with NodeJS applications as its API and Query model is very close to JavaScript syntax and patterns.
Let's start wiring Node with MongoDB as a datastore.
Fork and Clone the project https://github.com/CodeYourFuture/mongo-node-workshop. run
npm installthennpm run devto run the application with autoreload - Go to the browser and make sure it's up and running.Install the MongoDB Node.js Driver
npm install mongodb --saveLet's add an endpoint
api/studentsthat returns ajsoncontaining all the students that we've been saving to the database from the shell.
Go to the file controllers/apiController, on top of the file, require the
module
const MongoClient = require("mongodb").MongoClient;
then add an endpoint for /students
router.get("/students", (req, res) => {
  const mongoConnection = "mongodb://localhost:27017/profile";

  MongoClient.connect(mongoConnection, (err, db) => {
    const cursor = db.collection("students").find({});
    cursor.toArray((error, students) => {
      db.close();
      res.json(students);
    });
  });
});
Go to your browser /api/students and you should see a JSON containing the
documents we've added to the students collection earlier.
Exercise: Let's step through the previous code and understand it line by line.
- What is a Mongo conection string?
The connection string
follows this format:
mongodb://[username:password@]host1[:port1][,host2[:port2],...[,hostN[:portN]]][/[database][?options]].
What parts do you have in our connection string right now?
Exercise part 1
Now let's change the api/posts to also use the mongo database instead of the
json file under /data.
First step is to save the posts in the database. Similar to what we did with students collection, use the Mongo shell to create a new collection called posts and use insertMany to insert all the documents.
Change the endpoint
/api/poststo read its contents from the database (very similar code to what we wrote in/api/studentsendpoint). Go tohttp://localhost:3000/api/postsand make sure you see the posts. Update a document in the database (either check the documentation for update or use RoboMongo) and see if it gets reflected.Once you have the endpoint running, delete the json
data/posts.json.Now if you go to the root of your application
http://localhost:3000, you will encounter an error as it will still try to read from the file system but we deleted the file. Update the/endpoint to also get the Posts from the database.
Exercise part 2: refactor the code
Even though our code does what's supposed to do, it has several issues. We have
a lot of duplicate code—both endpoints GET /api/posts and GET / do the
same call to the database and then do something with it. It's only that
something (the callback) that is different so let's refactor the code to
eliminate duplication (DRY).
The variable
mongoConnectionis declared multiple times, that means that if the connection string changes then we need to change multiple places causing possibilities of missing one instance and causing errors. Let's declare it once and use it in the rest of the app.- Why is it bad to have duplicate code?
Extract the Mongo calls to seperate functions. Extract the route for
/api/studentsinto a function namedgetStudents- What will the function signature be?
- Remember the Single Responsibility Principle—the route handlers have multiple responsibilities right now: Connecting to Mongo, getting the data then sending it back as a response.
Move the new function to a new file called
helpers/db-client.js, export the functions and use them in the original file.- Do you remember how we create modules and use them?
module.exportsandrequire.
- Do you remember how we create modules and use them?
Do the same for the
/posts
Exercise Part 3: Deploy our app
Let's deploy our Database-Driven Application to Heroku. If you don't remember the steps, refresh your memory from a previous lesson.
Once you're finished, Go to your application on heroku and see if it is working properly.
It should not be working.
Can you have a guess on what went wrong? To see what's happening on the heroku
server, run heroku logs from the terminal and check the logs.
Mongo on Heroku
Heroku, AWS and other cloud services allows us to use databases and other services on the cloud without having to maintain physical servers making it easy to scale, monitor costs and build good solutions in general.
We've already used DynamoDB on AWS. This week, we'll do MongoDB.
Go to Heroku dashboard https://dashboard.heroku.com
Click on your app name in the dashboard. Go to Resources, under addons, search for mLab MongoDB and choose it. When you're prompted with this screen—click on Provision.

The new MongoDB service will appear under Resources-you can click on it and it will take you to a web interface to administer your MongoDB instance.
Go to the Settings and click on Reveal Config Vars. You should see the a variable called MongoDB_URI—that is the connection string for the MongoDB instance on Heroku (on mLab used by Heroku).
So how can we use this connection string instead of our local one?
Environment variables
In NodeJS, The process.env property returns an object containing the user
environment. Environment variables allow us to configure different aspects of
our application based on the environment where it's running—so for instance,
when we run our application locally, we want to connect to the local MongoDB but
on Heroku, we want to connect to a different one.
Connection strings are typically saved and used as Environment variables, other typical uses are with passwords, secrets, URLs of other services etc... Anything that is environment specific and that shouldn't live in the source code.
Security tip: Never add passwords, connection strings or any sensitive information in your source code, always use an Environment variable.
Services like Heroku and AWS can then use these environment variables to configure aspects of the application.
We've already used one Environment variable for Heroku before—what was it?
Exercise: Use the environment
MongoDB_URIto connect to MongoDB on Heroku, but fallback to localhost connection string if there is no environment variable provided.
- Commit and push the changes to Heroku and see if it works.
Coursework
Refer to the MongoDB/Node workshop for the Homework tasks - https://github.com/CodeYourFuture/mongo-node-workshop
Resources
- Why use a database: https://softwareengineering.stackexchange.com/questions/190482/why-use-a-database-instead-of-just-saving-your-data-to-disk
- Databases and Collections: https://docs.mongodb.com/manual/core/databases-and-collections/
- Documents in MongoDB: https://docs.mongodb.com/manual/core/document/
- Practice on a web Mongo shell: https://www.tutorialspoint.com/mongodb_terminal_online.php
- Environment Variables: https://www.twilio.com/blog/2017/08/working-with-environment-variables-in-node-js.html
- MongoDB SQL comparison: https://docs.mongodb.com/manual/reference/sql-comparison/